How Do You Tie a Clove Hitch Knot? (The Only Way You’ll Ever Need to Know)
Hey friend, welcome back to the woods.
You need a fast way to tie a rope to a tree, post, or pole. Then the clove hitch is the knot for you.
It works great when you set up a tarp, hang a lantern, or start a lashing. Plus, you can tie it quickly, even with cold or wet hands.
In this guide I show you exactly how to tie a clove hitch. I keep the steps slow and clear. I also share the history behind it, the best uses, common mistakes, and real backwoods tips from years of use.
What Is a Clove Hitch Knot Used For?
You can use it for many camp tasks.
- Tying tarps or shelters to trees
- Securing a rope to a post or rail
- Starting lashings or wrapping
- Hanging tools, lanterns, or gear
It ties fast. It holds strong under steady tension. So it works well whenever you need a quick, reliable attachment.
A Little History Behind the Clove Hitch Knot
The clove hitch is an ancient knot that dates back hundreds of years. Sailors used it as early as the first quarter of the sixteenth century to secure ratlines on ships. Early sculptures and paintings from that time clearly show the knot in use.
A round turn is taken with the ratline, and then a hitch is added below it. The forward end always gets made fast first.
Later, in 1769, William Falconer officially named it the “clove hitch” in his Universal Dictionary of the Marine. People still recognize it today as one of the most important knots, right alongside the bowline and sheet bend.
Citation: Clove hitch. (2026). In Wikipedia. Retrieved April 1, 2026, from https://en.wikipedia.org/wiki/Clove_hitch
Sailors, campers, and woodsmen have trusted this knot for centuries. It ties quickly and holds reliably. So it remains a favorite for practical outdoor work.
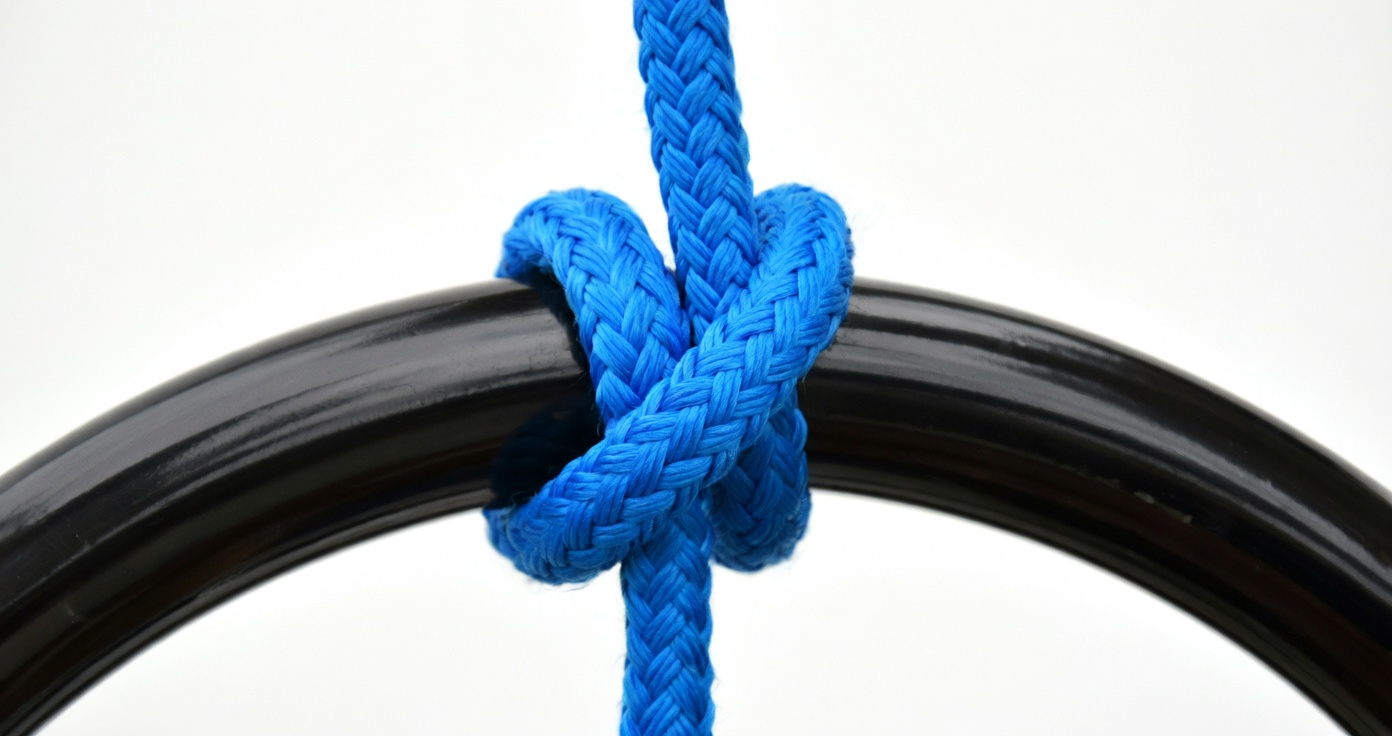
How to Tie a Clove Hitch – Step-by-Step
Setup Hold the rope with both hands. Take the working end and wrap it once completely around the tree or post.
Steps
1. Let the rope cross over itself so it forms an “X” shape on the front of the post. You should now have one wrap around the post with the working end coming out on the right side.

Keep holding the standing rope steady with your left hand.
2. With your right hand, take the working end and wrap it around the post a second time.

3. As you come around, slide the working end under the first wrap where the two ropes cross (under the “X”).

4. Continue pulling the working end all the way through until it comes out on the other side of the cross.
Hold the standing rope in one hand and the working end in the other.

5. Pull both ends steadily in opposite directions. You will feel the knot tighten and lock itself firmly against the post or tree.

Checkpoints
- You should see two wraps with an X in the middle.
- The knot should sit snug against the post.
Lock It In Pull both ends in opposite directions until tight.
Common Mistakes & How to Fix Them
Many people wrap in the wrong direction. Then the “X” never forms and the knot slips.
Others forget to slide the working end under the crossing point. So the hitch does not lock properly.
Finally, some use it for loads that shift or bounce. In that case the clove hitch can loosen. Switch to a constrictor knot or two half hitches instead.
Backwoods Tip I use the clove hitch almost every time I set up a tarp or hang something heavy. It ties fast and holds strong under tension. Plus, I can untie it with one hand when I finish. However, never trust it with anything that moves around. If the load shifts, this knot can loosen up on you.

Want More Easy Knots?
You just learned knot #3 of my 8 Essential Survival Knots.
If you liked this guide, grab the free PDF with all eight knots right here:
Download Backwoods Bob’s 8 Essential Survival Knots PDF
Or check out the next post in the series when it goes live.
Stay safe out there, keep your rope handy, and I’ll see you in the next one.
— Backwoods Bob
gridfreelife.com