Composting for Beginners: Easy Food Waste Tips
Composting for beginners is one of the fastest ways to turn everyday food waste into free, nutrient-rich soil for your garden.
Imagine opening your kitchen compost bin each day and knowing that every peel, eggshell, and coffee ground is quietly working to feed your plants instead of piling up in a landfill.
In 2026, composting has become simpler than ever thanks to affordable bins, faster methods, and widespread beginner-friendly resources.
This guide gives you a complete step-by-step system to start composting at home successfully — even if you live in an apartment or have never touched a compost pile before.
You’ll learn what to compost, what to avoid, how to build and maintain a healthy pile, troubleshooting tips, different methods for small spaces, and a realistic 30-day plan that makes composting feel easy and rewarding from day one.
Why Composting for Beginners Is Worth Starting Right Now
Food waste makes up roughly 30% of what most households throw away.
When it rots in landfills, it produces methane — a greenhouse gas far more potent than carbon dioxide.
However, when you compost at home, you prevent that methane release and instead create “black gold” — rich, crumbly compost that dramatically improves garden soil, boosts plant growth, and reduces the need for chemical fertilizers.
Additionally, composting cuts your trash volume significantly, which means lighter bins, fewer pickup days, and less guilt every time you take out the garbage.
Most beginners see their household waste drop by 40–60% within the first few months, and many families report saving money on soil amendments and even groceries because healthier gardens produce more food.

The Science Behind Simple, Effective Composting
Compost is created by billions of microorganisms that break down organic matter.
For the process to work quickly and odor-free, you need the right balance of four key ingredients:
- Greens (nitrogen-rich): Vegetable scraps, fruit peels, coffee grounds, fresh grass clippings, plant trimmings.
- Browns (carbon-rich): Dry leaves, shredded cardboard, newspaper, straw, sawdust, paper egg cartons.
- Air: Oxygen feeds the good bacteria — turn the pile regularly to keep it aerobic.
- Moisture: The pile should feel like a wrung-out sponge — too dry and decomposition slows; too wet and it becomes smelly and anaerobic.
The ideal carbon-to-nitrogen ratio is roughly 25–30 parts browns to 1 part greens.
Most beginners start with a simple 3×3×3 foot pile or bin and adjust as they go.

What to Compost (and What to Never Add)
Always compost these greens Vegetable and fruit scraps Coffee grounds and filters Tea bags Fresh grass clippings Plant trimmings (no diseased plants)
Always add these browns Dry leaves Shredded cardboard and newspaper Paper towels (unbleached, no chemicals) Straw or hay Sawdust (untreated wood only)
Never compost Meat, dairy, bones, or oily foods (attract pests and smell bad) Pet waste (can carry pathogens) Diseased or invasive plants Weeds with seeds Glossy or colored paper Synthetic materials
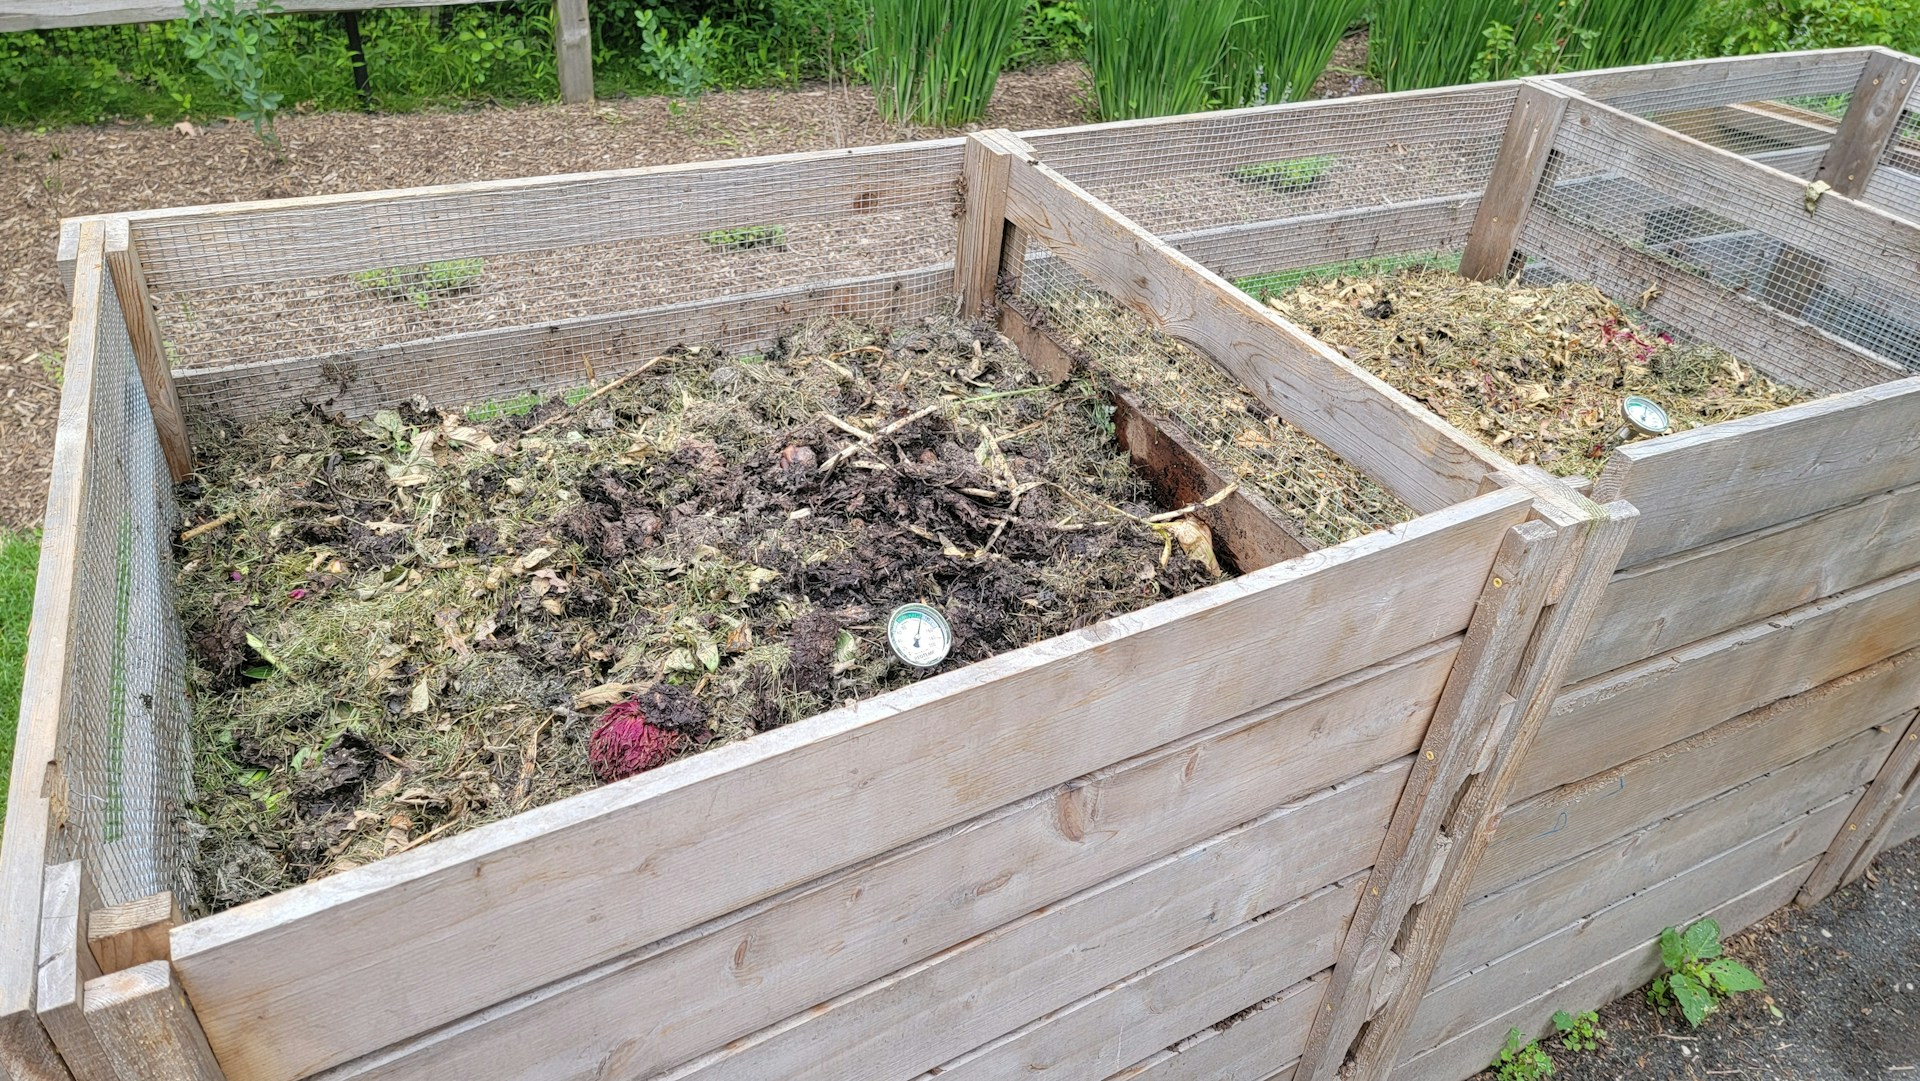
Step-by-Step: How to Start Your First Compost Pile or Bin
- Choose your system: Open pile (free, works in yard) Tumbler (faster, rodent-proof) Stationary bin (simple, affordable) Worm bin (indoor/apartment-friendly)
- Build the base: Start with 4–6 inches of coarse browns (twigs, straw) for airflow.
- Layer greens & browns: Add 2–4 inches of greens, then 4–6 inches of browns. Repeat until the pile reaches 3 feet high.
- Moisten and turn: Water until damp (like a wrung-out sponge). Turn the pile every 1–2 weeks with a pitchfork or shovel to add oxygen.
- Monitor & adjust: Too wet? Add more browns. Too dry? Water lightly. Smelly? Turn more often and add browns.
- Harvest finished compost: Bottom layers finish first — dark, crumbly, earthy smell. Use in garden beds, potted plants, or lawn top-dressing.
Apartment & Small-Space Composting Options

Worm composting (vermicomposting) Red wiggler worms eat kitchen scraps and produce rich castings.
Use a small indoor bin with ventilation and bedding (shredded newspaper).
Harvest castings every 3–6 months.

Bokashi Anaerobic fermentation with bran inoculant.
Fast (2–4 weeks), odor-free, works in small buckets.
Bury the fermented mix in soil to finish.
Countertop or balcony bins Tumbler or enclosed compost bin for limited outdoor space.
Troubleshooting Common Composting Problems
- Bad odor Too wet or too many greens — add browns and turn frequently.
- Attracting pests Meat/dairy or uncovered pile — stick to greens/browns and cover with tarp.
- Slow decomposition Too dry, too cold, or too many browns — moisten, turn, and add more greens.
- Flies or gnats Cover fresh greens with browns or bury them deeper.
Making Composting a Long-Term Habit
- Keep a small countertop bucket for daily scraps.
- Turn the pile weekly — set a recurring phone reminder.
- Harvest and use finished compost every 3–6 months.
- Involve the family — kids love turning piles and seeing worms.
- Most people see usable compost within 3–6 months and never buy bagged soil again.
Connect Composting to the Rest of Your Sustainable Life
- Once composting becomes routine, your kitchen waste fuels your garden directly.
- Pair it with Growing Food Off Grid: Gardens & Livestock Basics to close the nutrient loop completely.
- Reduce overall waste even further with Reduce, Reuse, Recycle: Easy Waste Reduction Tips.
- And when you’re ready for larger-scale waste solutions, see Off Grid Waste Management: Simple Solutions.
Composting for Beginners 30-Day Challenge
- Week 1: Choose your bin/pile style and collect greens/browns.
- Week 2: Build the first layers and add daily scraps.
- Week 3: Turn the pile once and adjust moisture.
- Week 4: Celebrate your first layer of finished compost — spread a little in your garden or pots.

The EAST OAK Outdoor Compost Tumbler is a wonderful addition to any backyard, the ability to rotate speeds up the process of composting. If you want a tiday and effective composter consider taking a second to check it out.
Frequently Asked Questions:
What is the fastest way to start composting at home?
Grab a countertop bucket and a bag of browns (shredded paper or leaves) — add kitchen scraps daily and you’re composting within minutes.
How do I stop my compost from smelling bad?
Add more browns (dry leaves, cardboard), turn the pile regularly, and keep it moist but not soggy.
What items should I never put in compost?
Meat, dairy, bones, oils, pet waste, diseased plants, and invasive weeds — they attract pests or spread problems.
How long does it take to get finished compost?
Hot composting takes 3–6 months; cold composting takes 6–12 months — turning and balancing speed it up.
Does composting actually save money?
Yes — most families save on bagged soil, fertilizer, and trash bags while growing healthier, more productive gardens.

Start composting for beginners today with one small countertop bucket and a handful of scraps.
The first time you spread your own rich compost in a garden bed, you’ll feel that deep satisfaction of closing the loop.
You’ve got this.
Your kitchen waste is ready to become garden gold.
Ready for the next step? Head over to Conserve Water at Home: Easy Daily Habits and keep building your sustainable lifestyle!